
 — කෘතිම බුද්ධියෙන් ව්යාපාරික අනාගතයට පියවරක්")


- 1 කොටස")


Updates කියන එක නවත්තන්න සුදුසු දෙයක්නම් නෙමෙයි.මොකද මේ Updates විදිහට එන්නේ Operating System එකට අවශ්ය වැදගත්ම අළුත්වැඩියා කිරීම්.ඒත් Limited Internet Connection තියෙන අයනම් Automatic update වෙන එකට එච්චර කැමති නැහැ.මොකද ඒ Updates සමහර විට ප්රමාණයෙන් GB කිහිපයක් වන නිසා.ඒක හින්දා අවශ්ය වෙලාවට ON කරලා අනිත් වෙලාවට OFF කරලා තියන්න විදිහක් තමයි දැන් කියන්න යන්නේ.
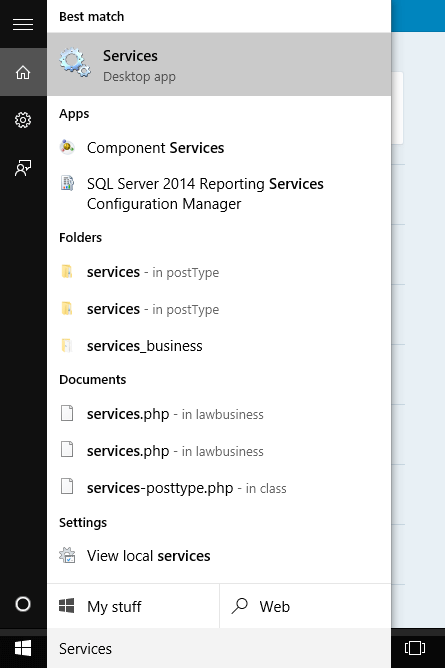
මුලින්ම Windows 10 Search box එකේ Services කියලා Search කරන්න.
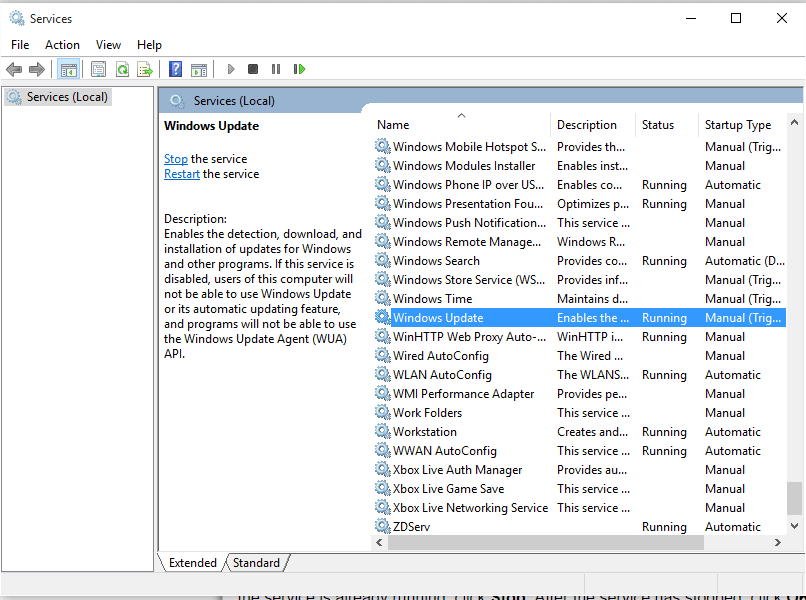
ඊටපස්සේ Services වලට ගිහින් ඒ එන List එකේ පහලට යන්න.පහලින් Windows Update කියල Service එකක් හම්බුවේවි.ඒක උඩ Double Click කරන්න.
දැන් අළුත් Window එකක් ලැබේවි.ඒ Window එකේ තියෙන Startup type කියන Drop-down List එකේ Disable තෝරන්න. ඊට පස්සේ Service status එක යටතේ තියෙන Stop Button එක click කරන්න.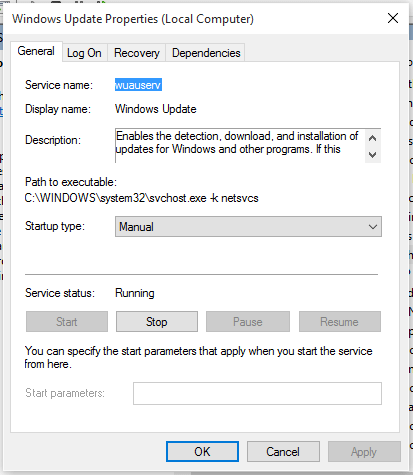 දැන් වැඩේ හරිද කියලා බලාගන්න ඕනෙ.
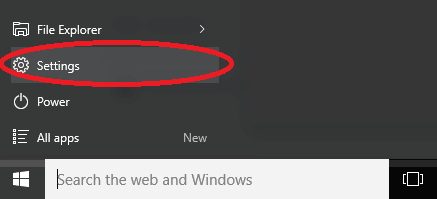
ඒකට මුලින්ම Settings වලට යන්න ( Action center එකෙන් හරි Start Menu එකෙන් හරි )
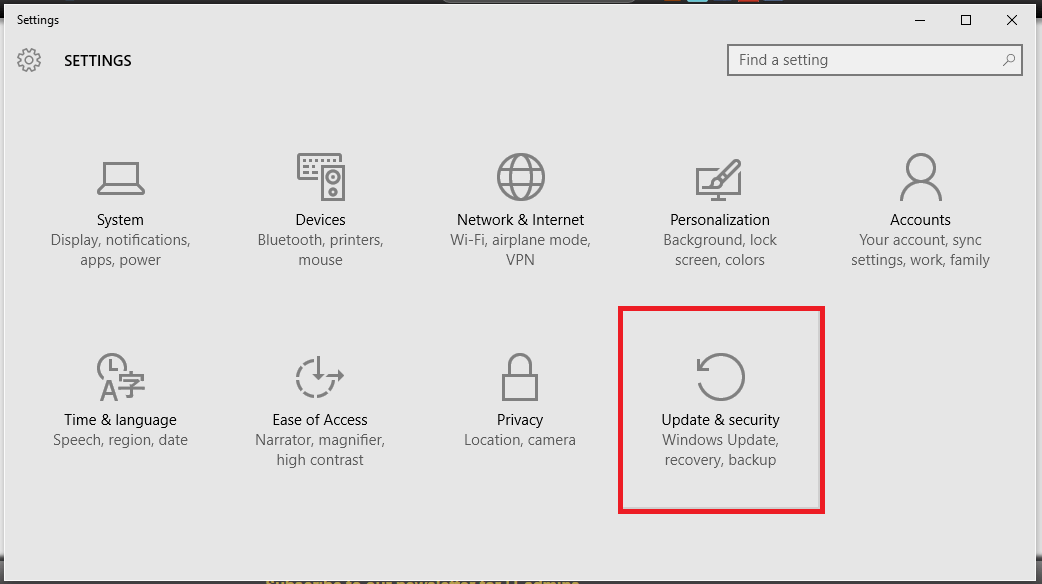
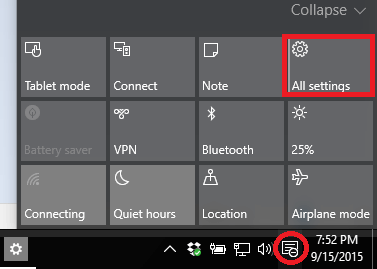 ඒ අළුත් Window එකෙන් Update & security තෝරන්න.
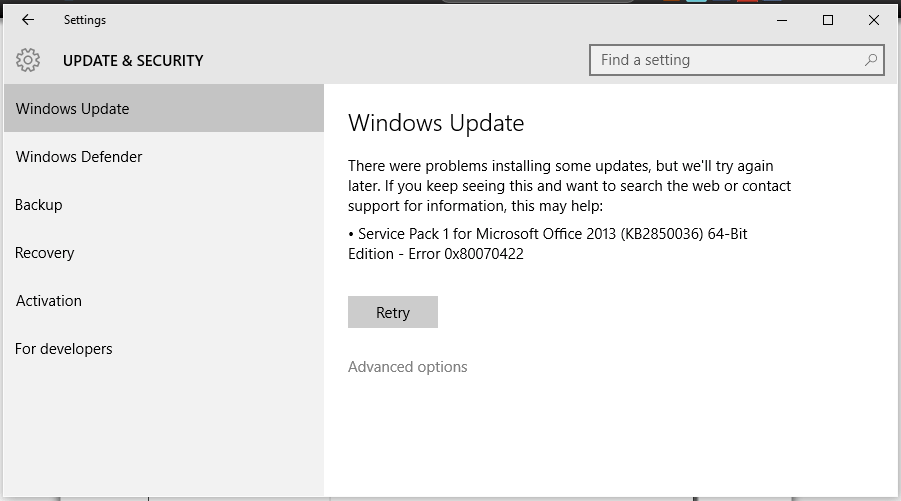
 Windows Update යටතේ ඇති Download හෝ Retry Button එක ඔබන්න. දැන් මේ ආකාරයට Error එකක් පෙන්වාවි ( “There were problems installing some updates” ) . ඒ කියන්නේ Update වෙන්නෙ නැහැ.වැඩේ සාර්ථකයි 😀 .ආයිත් Update අවශ්ය වුනාම කරන්න තියෙන්නේ අපි Disable කරපු Startup type එක Manual කරලා Service status එක start කරන එක.


